Lightening is one of the most sought after and the most dangerous methods of dyeing strands. Before embarking on beauty experiments, you need to understand what happens to hair during bleaching.
- Washed out pigment. Under the influence of a lightening agent, its own pigment dissolves and can be washed with water.
- The structure is broken. As the pigment is lost, a void is formed inside the hair.
- Hair spoils. As a result, the curls become light, brittle, vulnerable to external influences.
5 rules of preparation for the procedure
Even if you use natural products for lightening, such a procedure causes stress to the locks and may cause a deterioration in their appearance and quality. To minimize the risk, in two or three weeks start preparing hair for lightening. Follow the five rules.
- Do not dye your hair. Applying a brightener to dyed hair can lead to unexpected consequences. Instead of a golden blond, your hair can be blue, green or any other color.
- Make the care more intense. Regularly apply nourishing balms, as well as oil-based homemade masks.
- Minimize thermal exposure. Completely abandon the hair dryer, ironing and curling. Do not wash your head with hot water and do not expose the curls in direct sunlight.
- Do not use styling products. They degrade the quality of the strands. In addition, if lacquer or gel particles remain between them, they can enter into an unpredictable reaction with the clarifier.
- Avoid frequent washing. Wash greasy hair once every two days, normal hair once every three to five days, and dry hair once a week. If you use shampoo daily, you run the risk of washing the protective fat layer off the skin.
How to lighten hair with hydrogen peroxide
If you want to become a blonde, it is easier and cheaper to bleach your hair with hydrogen peroxide. The main thing is to keep the proportions and not to resort to the method too often. Remember that hydroperit can not only discolor curls, but can also destroy hair follicles. The procedure is carried out in eight main stages.
- Wash your head. And blot with a towel. Leave the curls wet, but they should not drain water.
- Comb the strands well. On matted brightening will be uneven.
- Prepare the solution. The contents of the 3% hydrogen peroxide vial should be poured into the spray bottle. Dilute with the same amount of water.
- Separate strands. Use clamps to facilitate the process.
- Handle the strands. Moving from the roots to the ends. After applying the peroxide, immediately wipe the curl with a sponge soaked in clean water.
- Please wait. The tool must be kept from 30 minutes to an hour, depending on the original color and the desired result. To enhance the whitening effect, warm the head with a film and a thick towel.
- Wash your hair with shampoo. It is advisable to use a sulfate-free remedy in order not to injure the hair even more.
- Apply nourishing balm. Abundantly. And soak for at least half an hour.
Folk recipes without peroxide
If you want to keep your hair healthy, you need to know how to properly lighten hair without dye. Of course, folk remedies do not give an instant result, but curls from them suffer much less. And some recipes are extremely beneficial.

With lemon juice
Features If you want to quickly lighten your hair yourself, give your hair a golden shade and a magnificent shine, try lighten your hair with lemon. The tool will give hair volume and elasticity.
- In a ceramic container or spray bottle, pour a glass of lemon juice, diluted with a quarter cup of water.
- Shake the mixture well and let it stand for 15 minutes.
- Process strands composition and leave for a couple of hours. It is advisable to substitute the hair in the sun.
- Wash your hair with plenty of shampoo and do not forget to apply conditioner.
- The following procedures are performed every three days for a month. Duration - no more than half an hour.
With chamomile
Features Perhaps the safest method to discolor hair is with the help of chamomile infusion. The option is suitable for tough, thick strands that grass gently soften and make more obedient. The fastest effect will be noticeable on light brown hair.
- Three tablespoons of dry chamomile pour in a thermos and pour a glass of boiling water.
- After four hours, strain the infusion.
- Dry clean hair well soak in the tool.
- Put on a shower cap, wrap a towel around your head and soak for one and a half hours.
- Rinse chamomile to clean water without shampoo.
- You can repeat the procedure at least every day until you achieve the desired result.

Features Cinnamon has not only a lightening effect, but also has several other benefits. We can not say about the heady aroma that remains on the hair until the next wash. And this spice stimulates growth, strengthens the roots and gives the strands a healthy shine.
- Two tablespoons of honey slightly melt and dissolve in the same amount of water. Add to the mixture three tablespoons of cinnamon and the same amount of your favorite conditioner.
- Using a comb, spread the product over wet hair and collect it in a bun.
- Wrap your head in plastic, wear a hat and wait a couple of hours.
- Rinse curls twice with shampoo.
- To discolor hair without yellowness, rinse them with water, acidified with lemon juice.
Features If you have oily scalp, the most appropriate solution would be to lighten the hair with kefir. Dairy products from antiquity were used as a lightening and regenerating agent.
- Apply warmed kefir to clean, dry curls.
- Collect the hair in a bun and wrap your head with a film and a towel.
- After two or three hours, rinse your head with shampoo and rinse with chamomile decoction.
With onion peel
Features Light onion peel will help lighten hair without harm to hair. The bleaching process of the strands is rather slow, but it will be accompanied by the complete restoration and treatment of split ends.
- Half-liter jar fill the husks of onions and fill the raw material with boiling water.
- Cover the container with a lid, wrap with a towel and leave until the liquid has cooled completely.
- Strained infusion diluted with water in equal quantities.
- The resulting composition to rinse the hair after each wash.
With white henna
Features Lightening hair with white henna will suit the owners of a weak and dull hair. Without any chemistry, you will get the desired shade and completely heal the curls.
- According to the instructions on the package, prepare the coloring composition.
- Spread the gruel on clean damp hair and soak for 40-60 minutes.
- Wash your head with warm water without any detergent.
- To give the strands elasticity and softness, rinse them with water, acidified with vinegar or lemon juice.
With olive oil
Features Brightening hair with olive oil requires repeated procedures. But your patience will be rewarded with a healthy shine, firmness and thick hair.
- A tablespoon of dried chamomile flowers, pour half a glass of olive oil.
- After 12 hours, strain the lightening oil and apply to damp clean hair.
- For one and a half hours, the sun rays should influence the strands.
- Wash your hair with soap and shampoo twice.
- Rinse with chamomile broth or water, acidified with lemon juice.
Aftercare
Remember that the discoloration does not pass for the hair without a trace. Even if you use natural ingredients for the procedures, the loss of pigment can lead to dryness, cross-section and lack of volume. To prevent this from happening, provide bleached hair with intensive care using homemade nutritional masks, the recipes of which are described in the table.
Table - Recipes for bleached hair masks
Stage number 2. Clarification process

- Prepare a brightener or hair dye, which will be used for the procedure. Note that bleach is very hard, but it gives a much better result. Dye differs in the careful relation to hair and head skin. As a lightening component, use 20% hydrogen peroxide solution, mixed with the purchased bleaching powder for hair in equal proportions. Combine components in a homogeneous composition. Be sure to perform the procedure with the windows open.
- Spend a comb over the head, making a parting. Tie your hair in two tails. First dissolve one and divide it into 7 strands, then do the same with the second. Use small rubber bands to separate the strands between themselves. Owners of thick hair are recommended to increase the number of sections to 10. Now we need to take a flat comb with a large number of teeth and comb each strand in the place where the ombre will begin. This method will help make the transition smooth, due to which the clarification will look harmonious.
- Proceed to the direct application of bleach. Take a little makeup with a brush or sponge and walk along the strands, starting with the tips. Your movements should be smooth, barely noticeable. Do not take a large amount of the drug, otherwise the clarification will turn out to be uneven and ugly. After the first stroke, make a second, but already more thorough. Spread the ends well so that there are no unstained areas. Rise above, carefully apply the clarifier to the transition point. Go to the following strands, covering them also in 2 touches. Use a mirror if the hair is short and you are working on the back of the head. Before completing the application, make sure that the transition line is blurred; it should not be clearly visible. Cut the foil into rectangular pieces and wrap all the straightened strands with them. Capture a slice of the base color.
- Now you need to withstand the clarifier for a certain amount of time. If you want to greatly brighten the ends, leave the bleach for 30 minutes. In cases where you need to make hair 1 tone lighter, hold for 20 minutes. Periodically check the result by removing the drug from a small section of the curl. When you get the desired shade, immediately proceed to the wash. Thoroughly rinse each strand, otherwise the bleach will remain on the hair, as a result of which the brightening will continue. Do not remove the gloves until the end of the procedure. After rinsing with running water, use a shampoo. Do not use masks and balms for 6 hours.
How to lighten the tips of the hair by folk methods
White onions. Take 4 onions, chop them in a combine, blender or grate to make juice. Mix the mixture with 200 ml. lemon juice and apply on the tips. Wrap the strands in foil, wait 5 hours. Do not worry that the hair will start to smell. Lemon completely eliminates the smell.
Kefir. Take 100 gr. Cognac, 5 quail yolks, 100 gr. kefir, 180 ml. lemon juice, 70 gr. ordinary purchased balm. Combine the ingredients in one composition and mix with a mixer. Apply to the ends of the hair, wrap it in foil so that the liquid does not leak. Wait 9 to 12 hours depending on the desired result.
The method is good because the procedure can be carried out even on very dull, brittle and damaged hair. Kefir strengthens hair follicles, promotes accelerated growth and saves hair from the cut ends.
Vinegar. Take 150 gr. honey, 3 lemons, 100 gr. vodka, 600 ml. vinegar, 60 g. rhubarb root Pour rhubarb with vinegar, put in stew for 45 minutes, stir constantly. Squeeze the juice from the lemon, rub the zest and add to the broth. Boil another 10 minutes. After the time, add honey and vodka, mix and put the mixture on the tips. Hold 15-30 minutes.
Do you want to change the image and lighten the tips? Perfect solution! Buy a 20% peroxide solution from the pharmacy and mix it with brightening powder. You can also buy paint, it is more gentle with respect to the hair. Use folk remedies that are not worse than cosmetic products cope with the task.
Alternative to blonde
 Some 20-30 years ago, if women painted themselves to update their image, the color usually changed radically. And most often, regardless of the natural shade, they wanted to become blondes. In the darker color repainted units. A blond is always in fashion. It is believed that he makes the image softer and more romantic.
The effects of coarse bleaching often interfered with enjoying all the benefits of bleached hair. In most cases, the hair was dry and stiff. It was impossible to comb it properly, without pulling out a couple of shreds. And the brilliance and elasticity had to forget for a long time, if not forever.
Fortunately, over time, the situation has changed. Modern compositions affect much softer and give your hair a very real chance to stay alive. In addition, new techniques have appeared that imply coloring not the entire head, but separately selected strands. At first it instantly became super popular highlighting. And literally in a few years, even more sparing methods replaced him, when the hair is painted only on the tips or in the lower third.
Main advantages
The main advantage in lightening only the ends is that the roots practically do not suffer. If natural is chosen as the base color, then nothing threatens them at all.
 In another shade you can repaint with tonic, natural or ammonia-free paints. But this is not the only advantage of modern techniques. For more than ten years, they remain relevant because:
- perfectly hide her gray hair,
- even classic haircuts are refreshing,
- can be performed on any length of hair,
- minimally damage the hair,
- do not require frequent correction
- allow you to smoothly change to a different color
- visually add volume to your hair,
- beautifully emphasize the oval and tone of the face,
- allow you to focus on individuality.
At your request, an experienced master will perform the clarification of any degree - from contrasting strands to the effect of natural hair burning in the sun. So these techniques give unlimited scope for creativity and self-expression.
disadvantages
The disadvantages of clarifying the tips too. Most often, after such procedures, they begin to split more strongly and require increased attention. The lower part of the hair and so lacks nutrition compared to the main length. In addition, it is often twisted. Over time, the ends naturally become thinner. And then there's the destructive effect of the brightening compounds.
Other negative points include the following:
 Even the tone after the partial bleaching of the strands is not easy. Therefore, if you get tired of uneven staining, you will have to seek the help of professionals.
- Clarified areas dry up more. They are not recommended to blow-dry and subject to frequent hot styling.
- Most technicians are quite complex. Run them at home with quality, especially on long hair, is almost impossible.
- Dyeing the tips on heavily curly hair looks unnatural - for them it is better to choose other techniques.
- Strongly damaged strands will have to be intensively treated before lightening the ends, otherwise there is a risk of losing a significant part of the length.
 Even the tone after the partial bleaching of the strands is not easy. Therefore, if you get tired of uneven staining, you will have to seek the help of professionals.
There are contraindications to discoloration. It is not recommended to do during pregnancy and lactation. With great care and in a well-ventilated area, a brightener can be applied to people suffering from bronchial asthma and pulmonary hypertension. Allergy sufferers need to make a test for skin reaction.
Lightening or coloring
In fact, there are two options for coloring the tips: lightening with or without tinting and coloring. The latter in some cases also suggests a preliminary discoloration.
- easier to do technically
 takes less time
- does not require knowledge of color,
- easier to bring in a uniform color,
- no need to adjust often.
 takes less time
But the coloring, of course, looks luxurious and stylish. Due to the game of various shades, the volume of hair becomes more visually. This technique allows you to create super-modern multi-color images and ideally select shades according to the color type.
Only a high-level professional is capable of performing such work. It is expensive, and in time it can take up to several hours.
Adjust the coloring will have more often, as shades of different colors are washed out unevenly. A normal toning with something averaged greatly smears the effect of staining.
Hair preparation
Bleaching hair is best done after their preliminary preparation. This will minimize the harmful effects of bleaching compositions:
 About two weeks before the procedure, begin a course of intensive therapy, alternating between nourishing and moisturizing masks.
- Pay attention to the state of the tips. Strongly overdried and damaged? In this case, be sure to spend treatment with oils.
- If henna was used for staining (less than a month ago), you will have to process the hair with a wash.
- Trim the ends before the session is not worth it. They will still receive additional damage. Better master will do it at the final stage of work.
- Preliminary discuss what means will be discoloration. For thin and weak hair, it is desirable to apply gentle creams or pastes.
- Carry out discoloration safer on unwashed strands. Then they will additionally protect the layer of sebum. But funds for styling on the head of hair should not be.
 About two weeks before the procedure, begin a course of intensive therapy, alternating between nourishing and moisturizing masks.
Important! Remember that when dyeing with the open method, the oxidation process is slower, so the hair is less damaged. But the procedure in this case will take more time.
Types of clarification
To date, there are several ways to brighten the ends of the hair. The following description of each technique is schematic. Therefore, it can not serve as a clear instruction to perform the procedure at home. But additional information will greatly facilitate the selection process.
 The chip of this method is a fairly contrasting, but at the same time a diffuse horizontal transition from darker roots to bright ends. This color looks great on chestnut, blond, red hair and even on natural dark blonde.
Lightening is almost continuous in about the lower third of the hair. Therefore, it is very important that the master has a good mastery of the paint stretching technique.
On short hair ombra does not look. It requires a hair length of at least 20 cm, otherwise the color transition will be too sharp and all the charm of the style will disappear. The clarified ends are tinted as desired. Using multiple shades is inappropriate.
You can try to repeat this technique at home by yourself. First, the roots and the upper third of the hair are darkened (if the selected base tint differs from the natural one). After 10-15 minutes, the middle part of the strands is worked through with the same paint. And after another 10 minutes, the brightening compound is applied to the remaining length of the length, shading the border between dark and light tones. The tips are wrapped in foil, withstand the required time and washed off. Thus, with the help of two colors it is possible to obtain three different shades.
Satisfied complicated technique, if performed correctly. It involves a smooth transition (from top to bottom) to very bright tips. In the salon, such a procedure on long hair can take up to 2-3 hours. The paint is applied with light vertical strokes on thin strands that are unevenly located all over the head, and then it is brushed down.
 In a simplified version (with a short haircut) balayazh can be done at home in 40 minutes. On medium hair in about an hour. You should not experiment with long ones, especially if they are all one-on-one. Torn and cascade hairstyles partially hide defects in coloring, and on a smooth head of hair everything should be done perfectly.
To smear the boundaries of the transition color, hair must be carefully combed. If the curls are of medium length, apply a bleaching agent with the brush to the selected strands with reinforcement at the ends. And short ones should be formed with fingers in sticking bunches and carefully paint over their sharp tips (the head should look like a hedgehog). After reaching the desired degree of clarification, wash off the paint.
This method was invented specifically for dark-haired beauties. But to make it black on the nature or after monochrome hair dye professionals strongly recommend. Achieve a soft color transition will not work, and bleached strands usually get an ugly yellow or reddish tint. If you really want to discolor the tips, you have to pre-lighten the whole head for a couple of tones.
By the way, shatush can be done almost to its full length, or only on its lower third. It depends on how much you want to refresh the original color.
 As a baseline experts advise the use of shades from the natural range. With them shatush looks more natural and stylish. Red and purple are washed out very quickly and can tint bleached strands.
This technique usually uses 3-4 close shades, which create a beautiful play. The darkest is located at the roots, and the lightest is applied to the tips. Between them, the master evenly distributes strands dyed in additional tones. If the work is done with high quality, hair looks completely natural. To achieve this result at home is extremely difficult.
California highlighting
According to women, the simplest and most natural form of staining. Involves the effect of creating a sun glare on blond hair.
It is performed in an open way. Therefore, minimally damages the hair. In addition, it is easy to control the desired degree of clarification. Ideally, it should be no more than 2-3 shades.
Such painting is easy to do at home. On thin strands, arranged in a chaotic manner, a lightening compound is applied with light strokes. Then the whole hair is worked out with a rare comb to comb the paint to the tips. After 10-15 minutes, the residues are washed away. Departure from the roots can be arbitrary, but the same on all strands.
Californian variation is Venetian highlighting. Technically, it is the same. Only for dark hair are used gold or red shades. It can be called a kind of coloring. This method of coloring makes the image very bright and perfectly deepens the natural tone of the curls.
 Modern youth trend. Its main advantage is the ability to paint with an easily washable spray or pastel crayons for hair. The essence of the technique is in contrasting staining of individual strands or the entire lower third of the head of hair in bright neon shades with a sharp transition boundary. Ideally, the impression should be created that the curl was placed in a jar of paint and taken out of it.
It is not far from the truth. Thus, it is really possible to paint individual strands at home, having previously diluted a small piece of shallow water. On blond hair, the effect will be excellent, and the dark ones will have to be lightened first - they will not shade on them. With the help of color spray, the necessary areas of hair are simply evenly filled with paint. But it should be borne in mind that the effect will continue only until the first wash.
If you want to create a longer positive mood for yourself and others, you will have to use resistant paints. It is better to choose them only from professional lines. In cheap products, the concentration of the pigment is much lower - the bright color will quickly fade. The shag will look faded. Remove bored resistant paint can be washed.
Home care
After any staining, and even more - lightening, the hair is in need of additional care. Even ammonia-free agents loosen the protective layer, partially destroy keratin scales, irritate and dry the scalp. The more you clarify the tips, the more they will suffer.
To mitigate the damage and restore the curls faster, professionals recommend:
 minimize hot stacking
- do not abuse styling products
- use shampoos and balms for damaged hair,
- make a correction no more than once every 2-3 months,
- 1-2 times a week to apply nourishing masks,
- use oil for the tips at least every other day,
- It is necessary to apply thermal protection before drying with a hairdryer,
- in the summer, use a spray with UV filters.
 minimize hot stacking
Do not neglect folk remedies. Rinsing grass with decoctions, oil compresses, kefir masks - all this with regular use will significantly improve the condition of not only the tips, but also the whole head of hair.
Technique lightening tips of hair
To date, a very popular method of staining. Many stars have not done an ombre for a single season. Its essence lies in a smooth transition from dark roots to bright ends.
It is better to entrust the clarification of the curl ends according to the ombre technique. This is a very difficult staining method.
Another popular dyeing technique is to brighten the tips. Immediately before lightening, do not be lazy to make a haircut and cut off the split ends.
It is also desirable to conduct a course of nourishing masks for the tips. In contrast to the ombra, with the balayazh technique it is possible to lighten not all ends, but selectively.
Lightening procedure:
- Well comb your hair so that it does not tangle.
- Divide the strands into four parts: the lower, upper and temporal-side parts. Secure them with clips.
- Separate one small strand and put a foil under it.
- Apply to the ends of the hair brightening composition.
- Dye the entire bottom of the hair in this way, then go on to the next.
- Soak the dye on the hair for a specified time. It is usually about 30 minutes. Then rinse hair thoroughly under running warm water with shampoo.
- After that, apply a nourishing mask or balsam on the curls. It is desirable that it be designed specifically for dyed or bleached hair.
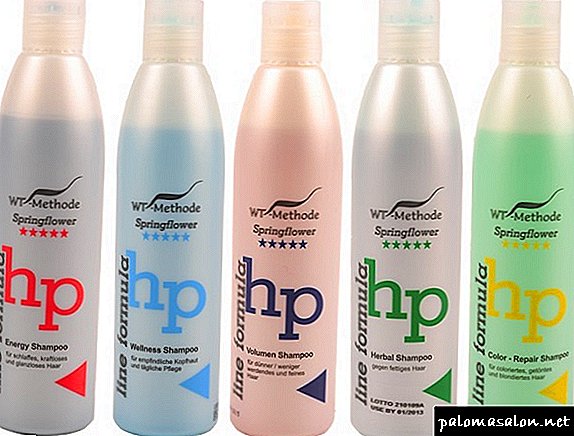
Popular professional hair lightening products
This tool can lighten dark hair for 6-7 tones without yellowness, while the harmful effects on hair is minimal. Essential oils and collagen contained in the paint soften the chemical effect.
The paint is very easy to use. It gently bleaches the hair, giving it a cool shade of blond and natural shine.
It is from the leading colors for discoloration. For home use developed a series of ammonia. Perfectly paints over gray hair. The effect after staining persists for a long time.
Able to lighten dark hair by 7 tones. The paint is quite aggressive, so before applying carefully read the instructions. An undesirable yellow tint may appear. Supra is ordinary and professional.
Perfectly copes with its task, without leaving a yellow shade. When used correctly, damage to the curls is insignificant.
In the Estelle line of bleaching products there are: a lightening cream paint, micro-granulated powder and paste WHITETOUCH.
Folk remedies for lightening hair
With the help of homemade products, you will not achieve a dramatic change in hair color. It is quite possible to lighten the curls by 2-3 tones lighter. Moreover, such clarification is absolutely harmless. Natural ingredients improve the condition of the hair, smooth the structure and add shine.
With the help of honey, you can lighten hair by 1 tone in one session. To do this, it must be kept on the hair for at least 8 hours. Honey gives curls a golden hue, as well as smoothness and silkiness.
You can lighten your hair with it, regularly rinsing them with water and lemon juice. Curls get a platinum shade. Also, lemon contributes to faster hair burning in the sun. But, you should avoid high concentrations of lemon juice, as this can lead to fragility and dryness of the curls.
A decoction of chamomile can lighten hair by 1-2 tones. At the same time strengthen them and give shine. But this option is not suitable for girls who want to get rid of yellowness.
Cinnamon works best on natural hair. It can lighten up to 2-3 tones. If the curls were previously painted, then thanks to this mask the color will become less saturated.
To prepare the mask with cinnamon can not use metal utensils.
A mixture of glycerin with chamomile tincture can lighten hair by 1 ton after the first use. To do this, it is necessary to sustain the mask on the curls for 40 minutes.
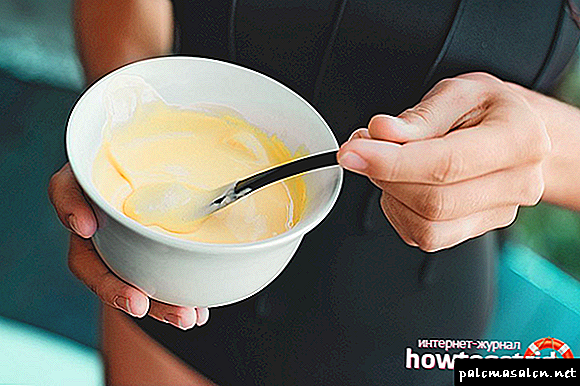
Kefir mask
For the procedure you will need:
Mode of application:
- Mix all ingredients thoroughly until smooth.
- Half of the resulting mixture is applied to the part of the hair that you want to lighten.
- Wear a shower cap on your head.
- Soak for 1 hour, then rinse hair.
- Repeat the procedure using the second half of the composition.
Soda mask
Ingredients Required:
Mode of application:
- All ingredients mix.
- Apply the composition to the ends of the hair.
- Hold the mask on the hair for 40 minutes.
- Rinse the hair with plenty of water.
Contraindication: very dry hair.
Ombre Tone Variations
In the translation "ombre" means darkened, that is, the color gamut, which has a smooth transition from darkened to lighter. In relation to the strands, the ombra represents the transition of one color shade of strands into another. But how to make this transition - sharply or harmoniously - this is an individual decision of each girl.
Before you decide to update the external image with the help of a modern ombre, you need to decide on a variety of tonal range. The color palette has numerical designations that are the same for the whole world. Accordingly, the values start at 1 (black) and end at 10 (ultra-blond).
The color palette table looks like this:
- 1 - black,
- 2 - deep dark brown or brunet,
- 3 - dark chestnut or dark brown-haired,
- 4 - light brown or brown,
- 5 - light brown or light brown,
- 6 - dark blond or dark blond,
- 7 - medium blond or medium blond,
- 8 - light blond or light blond,
- 9 - very light blond,
- 10 - ultra-blond.


Shades or podtochny, indicating the direction of the color gamut (copper, purple, etc.), also denoted by numbers, which are written after the value of the basic color tone.
When purchasing a suitable paint of the required tone, it is very important to pay attention to the table, since only with its correspondence the desired result will be obtained.
Ombre species
It is important to note that there are quite a few varieties of lightening the tips of the strands. So, ombra happens:
- The traditional two tone is proposed to use 2 tones, but between them the border is not clearly defined, visually it seems that the color stretches along the length of the strands. In this case, it is recommended to choose shades that are close to the natural color of the curls. See the coloring technique here.

- The traditional inverted - in this case everything happens the other way round - the roots are lightened and the ends are darkened.

- Vintage - according to a visual assessment, it seems that the roots of the colored strands simply grew back. The vintage ombre is in general terms similar to the traditional look, but the transition line here is more subtle.

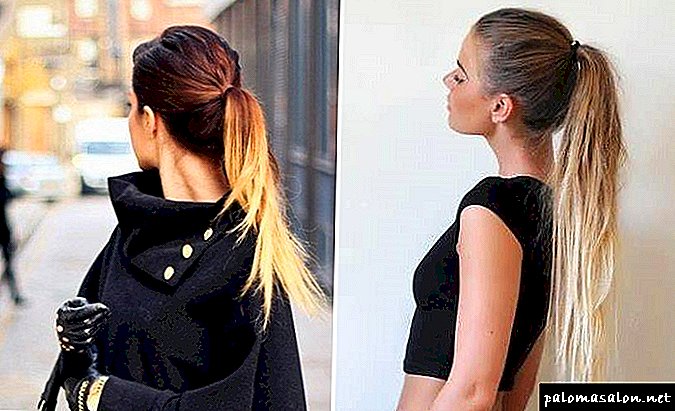
- Ombre “Horse tail” - here the strands are brightened in the “horse tail” zone. Ideally, this type of clarification to apply long-haired beauties. If a girl has bangs, then it is recommended to lighten it along the entire length.
- Transverse - the transition from dark to lighter tones occurs very slowly and gradually. In beauty salons, stylists can offer a variation of multi-stage overflow. Unfortunately, it will be quite difficult to repeat the work of masters at home.

- Border contour - clarifying the tips helps to emphasize the clarity and shape of the "puff" haircut.

- Scandinavian - perfect for owners of bright curls. In this case, there is a transition from the roots of the platinum shade to the darkened tips.

- Monochrome - is an analogue of the Scandinavian Ombre, but here the edge of the transition is indicated more clearly and brighter.

Who is suitable?
What is the name of the modern brightening of the tips of the hair is known, but who will suit the fashionable novelty?
Ombre can be made to almost every girl, it will look equally beautiful on short, medium and long strands. Ombre can be done on curly or straight curls, varying the length of clarification is allowed as you like - from a couple of centimeters to staining a few centimeters of the tips.
It is unique and unusual to look and shocking shades, that is, you can include not the main range of colors, but add a subtone - crimson, purple, platinum, white-blue, black and red, etc.

The most important thing that needs to be achieved is that with the help of a new image it is important to improve the external image, but in no way disfigure it. For this reason, it is required to thoroughly responsibly and harmoniously select the color tones of the coloring compositions.
Tips to help you paint your hair ends using the ombre technique:
Clarification technique
You can lighten any natural tones of the strands, but there is a huge difference between coloring light (6-7-8- ...) and dark (1-2- ...) curls. It is important to remember that it is impossible to make a burning blonde out of a bright brunette; this rule should always be remembered when choosing the tone of the coloring composition.
Without special losses, 1 tone shade of strands can be lightened only up to 8 tones (see the table above), but in this variant it is necessary to prepare for reusable and gradual dyeing. Of course, along with staining, it will be necessary to apply appropriate means for healing and restoring the strands.
Stylists recommend initially to try not to lighten the whole mop, but to start with 1 strand. It is necessary to lighten it in the selected shade, if the result is satisfactory, then we can safely continue clarification of the remaining tips.

It is important for owners of thin, fragile and painful curls to remember that by 3-4 subsequent brightening hairs are at risk of becoming lifeless, dry, dull.
In any case, despite the choice of the coloring composition, there will be a clarifier in each of them - the main component for obtaining a positive result of dyeing. The brightener is always made on a chemical basis, which adversely affects the health of hairs. Before you visit a beauty salon or try to lighten the tips of the strands at home, you need to prepare for a long-term and high-quality restoration and healing of the structure of the curls.
There are many ways to paint the tips of the strands at home. But to achieve a positive result of clarification to the owners of curls with a tone range from 1 to 4 is best in salon conditions. Girls whose strands belong to the tones from 5 to 7 can safely carry out the procedure yourself.
It is easier to carry out the brightening on long strands, but on short hair the brightening of the tips is carried out carefully and it is best to entrust this procedure to a professional master.
The main basis for a beautiful and gentle straightening of the tips of the strands is the choice of the coloring composition. You can buy any hair clarifier, and you can give preference to professional ombre paints. Before the procedure, it is important to study the instructions for use of the dye composition and to make a test for allergies.

The coloring composition is diluted only in glass or china, it is strictly forbidden to use plastic bowls for such purposes. Coloring strands necessarily held in gloves.
- Apply to the ends of the strands (5 cm from the length) the coloring composition with a special brush. Wait 5 minutes. Then paint the tips again, and at the same time it is necessary to capture the zone above the painted tips.
- Thus, with a break of 5-10 minutes, it is necessary to stain the entire desired length of the tips.
- After staining the entire desired length of the ends, the hair is combed with a comb with thin teeth.
- Wrap each strand in foil, hold no more than 15 minutes.
- After the expiration of the necessary time, the foil unfolds, the coloring composition from the ends of the hair is washed off.
- The completion of the lightening procedure is applying a means to fix the color to the curls.

Important nuances
- Coloring composition for brightening the tips is applied to clean and thoroughly dried strands. Before dyeing, they must be combed and divided into equal partings.
- The paint is applied to the strand from all sides; it is important that each strand of hair is carefully dyed.
- The total duration of the staining procedure should not exceed 15 minutes, otherwise the risk of getting uneven staining increases.
- If two-tone dyeing is used, the hair roots are first painted in dark colors, and then the tips are lightened.
- If it is necessary to achieve a sharp transition from one tone to another, then the boundaries between the staining should not be in contact with each other.
- The duration of the dye (in diluted form) lasts no more than 40 minutes, after which the paint loses all its basic properties. To obtain a positive result, after dilution it is important to use the paint immediately for its intended purpose.

It is important to remember that ombra affects the curls more negatively than regular coloring. After the hair dye has been clarified with the chemical dyes of the hair ends, they will need a long-term restorative procedure. With particular care to the appropriate procedure should be treated girls with dry and thin strands, as fashionable dyeing can make hair lifeless and provoke early baldness.
See also: Dye ombre hair at home (video)
Benefits of Brightening Techniques
Brightening the tips of the hair looks beautiful and stylish, especially if the curls are long. Especially effectively it looks on dark or chestnut strands, attracting the views of others. In addition, partial bleaching has many advantages:
- it can be done with any length of hair, the main thing is to restore the tips in advance, cut off split and brittle,
- You can choose any shades - from natural (light brown, light, copper or chestnut) to exotic colors - blue, green, orange or acid-red,

- any girl will be able to lighten the tips of her hair at home, without resorting to the services of masters in expensive salons,
- the procedure itself does not take much time, it takes only one small package of paint or tonic,
- if desired, you can simply cut the painted areas or restore your color without spoiling all the hair.
Ombre Lightening
Ombre is a smooth stretching of shades from dark to light, at which the transitions are almost invisible to the eye. Lightening tips on this technology involves the use of two or three tones of a similar paint color. Before starting the procedure, it is desirable to restore the strands with the help of nourishing masks, balms, so that after dyeing the ends do not look untidy.

Stepwise application of the dye:
- First, we distribute the entire volume of hair into 3 equal parts, leaving one behind and two on the sides of the head. Each secured with a rubber band or clip.
- After that, we coat the lower zones with dark strands of paint, wrap with foil. Hold for half an hour, then wash off with shampoo.
- Re-apply a lighter shade of the composition, wait 10 minutes. My head, dry.
The result after completing all the stages will give the strands a fashionable ombre effect, revive the dull hair.
Lightening method balayazh
This option is more often chosen by ladies who care about the appearance of hair, her health and beauty. Before dyeing, you should try to restore weakened locks, applying home or purchased masks, serums, decoctions of herbs for several days in a row.
Balayazh will allow for the correct application of paint to create an interesting overflow of shades, as if the ends were burned out in the sun.
Before the procedure, at least a day should refrain from washing the head, foil and plastic caps are not recommended. After washing the hair should be dried with a towel without using a hair dryer.

Step by step balayazha:
- We divide the entire mass of hair into parts of unequal thickness, comb it with hair, in order to “stand on end”.
- We retreat from the ends of 3-4 cm, depending on the length, we coat them with paint.
- About 10 minutes after applying a brush, we smear a small amount of paint at the roots.
- After 30 minutes, wash off the remnants of paint with shampoo, dry naturally.

Lightening the tips of the hair with the balayazh technique will make it possible even at home to create a stylish hairstyle that allows you to look younger than this age.

Choice of technology dip dye
This new technique became popular only a couple of years ago, mostly it was chosen by girls younger than 20 years. Lightening dip dye involves blending at the ends of bright, contrasting tones, creating sharp transitions.

First, make the discoloration, then put the selected shade with a brush. It should be done very carefully, otherwise it will not be possible to restore the original color - only trimming the repainted areas will help.
Also, the dip dye method suggests applying not colored dye or tonic, but bright colored mascara, special food colors to the bleached ends.
The second option is much easier to perform - in a container with a solution just dipped curls to the desired length, and then dried naturally.


The use of folk methods for clarification
Those who are afraid to use chemical compounds and oxidants can be used for bleaching the ends of proven national methods. Good effect gives the use of cinnamon, lemon juice, honey, kefir, chamomile infusion.
At the same time such masks help restore damaged hairs.
- Mask with kefir, cinnamon and honey. We take all the products in the same proportions (for example, 2 spoons), mix thoroughly. Distribute the mixture to the desired length, hold for an hour. After rinsing, rinse with lemon water. Repeat the procedure 5-6 times a day.

- Rinse with lemon and cinnamon. Take these ingredients in a tablespoon, stir in 500 ml of water. Rinse the ends daily for 7-10 days.
- Infusion of glycerin and chamomile flowers. Pour a couple of spoons of pharmaceutical chamomile 200 ml of boiling water, insist. After cooling, filter, pour in 2 tablespoons of glycerin. Apply to the ends, after an hour just wash off with water. In addition to the brightening effect, the mixture will help restore the lost shine and elasticity of the curls.


Which method or home method of bleaching to choose depends only on the length of the hair, personal preferences and skills. In all cases, the hairstyle will look stylish, youth, will give the strands a shine and a spectacular appearance. For the first time when performing an ombra, balasteer or dip dye, it is better to take a girlfriend as an assistant in order to achieve a uniform, uniform color transition.
Paint selection
Before you begin to brighten the tips, you need to make the right choice of paint for this purpose. Preferably, of course, the use of funds on a natural basis.
L’Oreal company produces a special line of Ombre paints, which will help to paint the curls in different colors. It looks like a simple paint, but when it comes to curls it changes their color from dark to light at the ends with a gradual transition. It’s hard to believe, but those who have tried L’Oreal’s Ombre effect on themselves claim that only paint is capable of it. But the only condition is healthy hair.
When choosing a finished paint give preference to proven manufacturers with a rich palette of colors.
In addition, the effect of clarified ends is obtained by applying several means. For this fit any quality paint. Lightening is obtained thanks to the Essential Color tool from Schwarzkopf. The composition of the paint is not ammonia, because there is minimal damage to the hair.
With the proper selection of shades of colors Color & Shine from Garnier you can achieve an interesting result.

And Wella offers over 70 different shades. The Londa line is a bit poorer, but there is no ammonia in its products, they are almost not harmful. Matrix products are great for brightening the ends on dyed hair.
Brightening the tips in the style of ombra do it yourself
So, to brighten the tips in the technique of ombre is required to choose paint. The stores have in stock special tools for ombre. In addition, you can take the clarifier. It is necessary to carefully read the instructions before use. The paint must be diluted in a glass or plastic bowl. Do not use enamelware! Wear gloves during the painting process:
Brush on the tips of the coloring agent, taking about 5 cm. Allow the agent to act for 10 minutes and apply again. Here it is important to capture not only the paint ends, but also the area above them,
thus, in stages, with an interval of 10 minutes, cover the hair zone by zone, climbing higher each time,
Using a comb with frequent teeth, distribute the product evenly. Wrap hair in foil and hold for a quarter of an hour,
wash away paint, apply the looking after means.
You can create a trendy balabazh and ombre on your own hair. It is enough to follow the basic rules of staining.
Remember that with such brightening of the tips, they experience a greater negative effect of paint than with traditional dyeing. If you have too broken and brittle ends, then you should not resort to this method.
Brightening the ends of the hair
The technique of brightening the tips of the hair using the balazhig technique is somewhat different from the ombr. Here comes the effect of the depth of the hair near the roots. This is achieved by the visual volume with a very smooth transition to the clarified ends.
Paint is applied with vertical brush strokes. Here you should not worry that there will not be a smooth transition of tone. This technique is easily performed at home, because it is much easier than it seems:
if you have a short haircut, then hair should be combed, so that they do not fall off under the weight of the paint, divide them into identical bunches,
paint each part from the ends without reaching the root by 2-3 cm,
after 10 minutes, it is required to apply and shade a new layer of product, already a little closer to the base (up to 1 cm should be left),
after 20 minutes the coloring agent is washed off.
If the hair is medium in length, then instead of combing, collect them in ponytails.
Peroxide Brightening Hair
To lighten your hair with peroxide you will need:
peroxide solution 3%. You can not use the tool more than 3%, because this will cause damage to the curls,
tank with a spray,
clamps
crest,
cotton pads,
towel,
balm,
foil,
hair wash.

First get ready for the process. You will need safety glasses and gloves to protect against the negative effects of peroxide,
before using peroxide, wash the ringlets to remove dirt,
dry with a towel,
untangle your hair well in order to avoid the formation of nodules. This is important because the shade will be different on them
fill the container with a spray with a peroxide solution, or dilute it with water in a 1: 1 ratio,
if you want to lighten several strands, then dip a cotton pad in the tool and lubricate some of the locks. Another option is to spray the solution with a thin layer on top of the hair,
in order to dye all the hair, divide them into parts, apply the solution to each,
after the manipulation, leave the tool on the curls for a while to achieve the desired result. The duration depends on the source color and the desired,
The average duration of the procedure is about 45-60 minutes. After 30 minutes, try washing out some curls and checking the shade. If it fits, then rinse all hair, if not, then wait another quarter of an hour or half an hour,
after washing off the peroxide, brush the lotion with the balm. This will help regenerate softness and radiance. Balm hold for 30 minutes
repeat the manipulations until you get the desired shade. Peroxide brightens well curls, but not immediately. Perform new procedures every other day.
temperature will speed up the clarification process. If the hair is undamaged, use hot air to stimulate coloring.
The use of peroxide gives a positive result only if the instructions are followed. Do not exceed the specified time and percentage composition.
While the process of peroxide dyeing is in progress, you can go to the sun to enhance the whitening effect. To do this, in the process of finding under UV comb curls. Hair dryer is also suitable for speeding up the procedure. From the strands make a bunch at the top. Wrap in foil, which heat the hair dryer no more than 15 minutes.
To brighten the tips or individual strands, take a solution of 3% peroxide in conjunction with water. Water should be 30% of the total volume of the solution. You can add balm. After creating the solution with a spray spray it on the ends. To get a light shade, you need at least 3 procedures.
Dip Dye Tip Tinting
We all loved to draw pictures with bright colors. Shades of green, purple, blue fascinate. Contrary to the trend of naturalness and naturalness, there is a fashion for coloring tips in the style of Dip Dye. He gives extraordinary fashionistas the opportunity to get a yakrey strands.

Blonde girls are easier to make such a coloring. The color is bright and deep. For dark hair requires a fixer stronger. The painting process can be simplified by bleaching the ends. Of course, every day such a hairstyle is not suitable for everyone, so pastel crayons are invented to create a temporary effect.
This temporary version of painting is that the ends of the hair are dyed with pastels or special crayons. The first washing of hair eliminates this image. Pastel produced in the form of jars with powder. Their use is distinguished by convenience. The strand should be twisted into a braid and painted to the desired length.
Dip Dye effect looks better if you twist your hair. Thus, bright shades play with all colors.
Coloring the tips with food coloring
Curls of different colors can lift your spirits. Bright colors add a festive feeling to any day. But what to do if you want to create a mood right now, and pastels are not at hand? The staining of the tips with food coloring comes to the rescue. This is a harmless analogue of paints Dip Dye. So, it will be required:
white balm,
a bowl,
brush or brush,
dye.

Mix 100 grams of balsam and 2 packets of dye in a container. Brush the tips or specific curls. In order not to dye too much, pinch your hair high. Another option is to twist the colored strands in foil. After 30 minutes, gently rinse off the dye.
When applying it, remember that there is almost no chemistry in such a dye. Because of this, it is safe for hair. But the causticity has not been canceled, because when it comes into contact with skin it is difficult to wash it off. To avoid trouble, cover your shoulders and neck with a towel and wear gloves on your hands.
Advantages of coloring only the ends
 In matters of stylish hair dyeing, ombre, dip dye and balayazh have received deserved world approval. They emphasize the beauty and luxury of hair, give them extra volume and chic.
The advantages of clarifying the tips include:
- Lack of long and painful procedures on alignment of tone and elimination of yellowness. For ombre, many women try to use ginger shades for the effect of sun-faded curls
- Fashionable - partial coloring is now in trend,
- Versatility - such clarification is applied to any hair length, suitable for everyone,
- A rich range of colors - the choice of colors depends on the individual preferences of the client. This technique allows you to make a rainbow of natural colors (black, chestnut, red) or extravagant shades (green, neon or bright pink) on your hair,
- The procedure takes less time and requires less coloring,
- If you do not like the final result, you can trim them, and with full painting you only have to cut your hair well,
- Only chemical ends are exposed to chemical attack.
It is impossible expose broken and loose tips to even partial staining. They under the influence of chemical dyes can easily turn into a washcloth and become completely lifeless. Before the transformation procedure, be sure to take care of the health of the curls.
Types of popular lighting techniques
Among the techniques of lightening the tips of hair, 3 techniques won world fame and popularity:
- Ombre - assumes a smooth stretching of color from dark (main) to lighter (at the tips), for this, at least two other new shades are used. Officially, the ombre technique appeared in 2010. It was first demonstrated by the famous actress of America Sarah Jessica Parker. The idea of painting was taken by stylists from surf lovers, whose curls gradually burned out in the sun and grew, a kind of transition from the main color to the burnt one was obtained. Light curls give a special chic to the technique, the color of the strands “plays”, shimmers. Later, the barbers began to experiment and several affiliated techniques appeared - this is “sombre” (the difference in color between the roots and the tips is different in half a tone) or the coloring of the ends in bright shades.
- Balayazh - not at all a new method of transforming curls. Nowadays, "balayazh" is experiencing a second glory, the first time they learned about it from French stylists back in the 70s. “Balayazh” is very similar to “ombre”, but one additional tone is involved, and they begin to smooth it not along the entire length, but from the middle. For "balayazh" characteristic distinguished individual strands in the face. Stylists note that after such a transformation the face looks younger by at least 5 years.
- Dip dye - an interesting, bright coloring technique for girls up to 20 years. Outwardly, it looks like the tips dipped in paint, no smooth transitions and gradient. The peculiarity of coloring is bright and acrid shades, they give their owners boldness and uncommonness.
Any of these techniques will refresh and emphasize the individuality of the face, will give charm and slight negligence in the hair. Feel like a Hollywood beauty.
How to choose the technique, color and not look "cheap"
Properly selected clarification technique allows you to look spectacular and Hollywood beautiful. But in order not to receive instead of the promised luxury a “cheap” parody, listen to the advice of experienced stylists:
- Fair-haired girls can experiment with all colors, but experts recommend staying on amber or red shades, as Kate Bosworth (Orlando Bloom's girlfriend) did,
- Plum-tips are suitable for brown-haired women, and stylists are advised to brunettes to choose expressive contrasting colors (pink, purple, red) or calm, brown, to brunettes,
- In order for the color on the dark ringlets to look perfect, the hairdresser must conduct a discoloration of the ends and only then apply the chosen tone,
- After staining should not be seen clear transitions of shades - it deprives them of special beauty. Try to make the transition as smooth as possible to achieve harmony and unity in appearance, like on a glossy magazine cover,
- For women with a graduated haircut for short and medium-length strands, it is recommended to use ombre,
- Technique “balayazh”, “ombre” luxurious look on curls, there is an additional feeling of lightness and chic, but girls with perfectly smooth long curls should not be used to avoid looking “cheap” and untidy.
It is possible to dye hair using any of the indicated methods in the salon or at home. Next we will tell in detail how to do it at home.
Cooking curls to lighten
Experienced hairdressers recommend regular use of nourishing and revitalizing masks 2 months before the transformation, applying vegetable oils to improve the condition of the strands and prepare them for chemical exposure.
If you decide to make a haircut before painting, then limit yourself to minimal trimming or discard it altogether.
1-2 days before the procedure, do not wash your hair.
What you need from the tool
Prepare a tool and items that may be needed in advance, so you do not get distracted by their search. You will need:
- coloring powder and oxidant or ready-made paint for coloring one or several shades, depending on the chosen technique,
- plastic container
- paintbrush or sponge for applying paint,
- comb with rare teeth,
- comb with a sharp tip for easy separation of the strands,
- simple rubber bands, plastic clips,
- foil,
- an old t-shirt, bathrobe or peignoir,
- a pair of gloves.
Tip! For brunettes and brown-haired women, stylists recommend first bleaching strands, and then starting to dye. So, you will achieve the desired and rich color. And do not forget about the care of bleached hair.
Making ombre at home
The ombre technique involves the use of several shades that guarantee a smooth transition (overflow) from the root zone to the ends. Home staining is performed in two ways:
Method 1
- Divide the hair into three identical zones: two side and middle. Secure them with rubber bands.
- Paint first the ends of the side parts, then the middle.
- Wrap the colored strands with foil.
- After half an hour, rinse with warm water and shampoo.
- Lightly dry your hair, apply a second coat of paint in the transition area to hide its borders.
- Soak the paint for 10 minutes, then rinse with warm water and shampoo.
Method 2
- Apply a dark shade to the root zone.
- After 10 minutes, distribute the same composition to the middle of the length of the curls, without touching the ends.
- Finally, apply a light paint on the ends.
- Wrap curl tips in foil.
- Soak time specified in the instructions.
- Wash off the paint with warm water and use a shampoo, a balm after dyeing.
Tip! To give a zest and expressiveness to a new look, clarify how much the strands of the face.
Useful ombre staining video:
We master the technique "balayazh" at home
The technology of performing “balayazh” on short and long hairs varies a bit, consider in detail all the options:
Method 1. For long hair with the same length curls
- Divide the hair in a vertical parting into 2 equal parts.
- Apply the prepared paint only on the tips.
- Wrap the treated areas with foil.
- Wait for the ends to brighten, comb them with a comb with rare teeth. This will smooth the transition.
- Close the foil and keep the remaining time.
- After the time specified by the manufacturer of the dye, wash off the residues and wash your hair with shampoo, conditioner for the colored curls.
Method 2. For long hair with a graduated haircut
- Gather the strands into one high tail so that the ends become flush. As a rule, this tail is located in the crown.
- Cover the hair near the tail with a bag or foil to prevent coloring particles from falling on it.
- Color the tips of the tail strands. It is not necessary to apply the agent to the entire length of the tail. It all depends on your idea and the length of the curls.
- You can additionally wrap the treated areas with foil.
- After a while, remove the foil, the gum and wash away the residues with water. Wash your hair with shampoo and conditioner for hair after dyeing.
Method 3. For short haircuts
- Stir the curls closer to the skin of the head so that the ends look up. For better stability strand varnish.
- Spread some of the paint onto the foil. Painted side swipe on the head of hair.
- If you don't like the foil version, you can do it with your fingers. Dip your fingers in the paint and, “pinching” the strands, apply the composition to the hair.
- When all the strands are dyed, note the time.
- After the time specified in the instructions to the paint, wash it off the head.
- Wash the hair with shampoo and use the conditioner.
Useful video balayage - application technique:
Dip dye at home
The dip dye technique does not require smooth transitions, so it will be the easiest option for home dyeing. You can color individual strands by covering them with foil, or evenly process the ends with dye composition.
For dip dye, bright colors are used, so if you don’t like the result, you will have to cut the transformed ends.
Cosmetic companies went to meet extravagant personalities and created mascara, crayons for hair. They guarantee a bright temporary reincarnation. This is a good way to experiment and dwell on the result you like; you do not need to cut the ends each time.
Just 5–10 years ago, women praised the magnificence of the head of hair of Hollywood actresses on the cover of magazines, but could not afford such a reincarnation. Today everyone has such an opportunity; you can achieve a luxurious result on your own at home. Try, experiment, but do not forget about the health of curls!
Useful video coloring on the dip dye technique:
You will learn more useful tips from the following articles: